

How To Print On Adhesive Label Sheet Template
Template Tuesday Presents...how to apply Word's Create Labels tool to apace impress a canvas of address labels.
In this week's Template Tuesday post, we're going to show you how to print a canvass of address labels in Discussion. This guide will explain how to use Word'southward congenital-in Create Labels tool to quickly and easily set up a template to print a canvass of self adhesive labels with your required address.
NB: This method is but suitable for printing a canvas of sticky labels with the SAME address.
CREATE LABELS – STEP Ane: OPEN THE CREATE LABELS TOOL
- Open Discussion and create a new Blank Document.
- Click on the MAILINGS tab at the elevation of the folio.
- In the "Create" section on the left hand side of the ribbon, click on LABELS.
The "Create Labels" tool will now appear on your screen as box entitled "Envelopes and Labels".
CREATE LABELS – STEP TWO: SELECT A COMPATIBLE Characterization TEMPLATE
- Click on the OPTIONS button. This opens a new box entitled "Label Options".
- "Printer information" must exist set to Page PRINTERS and "Tray" must be set to your media bypass tray – if your printer has one.
- Select the right "Characterization vendor" (e.g. A4/A5).
- Select a compatible template code from the list and click OK.
NB: if your A4 labels don't have a compatible template, you need to click on NEW Characterization and ready your ain label template. Y'all can find instructions on how to do this hither.
CREATE LABELS – STEP 3: ENTER YOUR ADDRESS
- Blazon your accost into the Accost BOX.
If yous but want a plain sheet of address labels, y'all tin can at present load your A4 labels into your printer and press print.
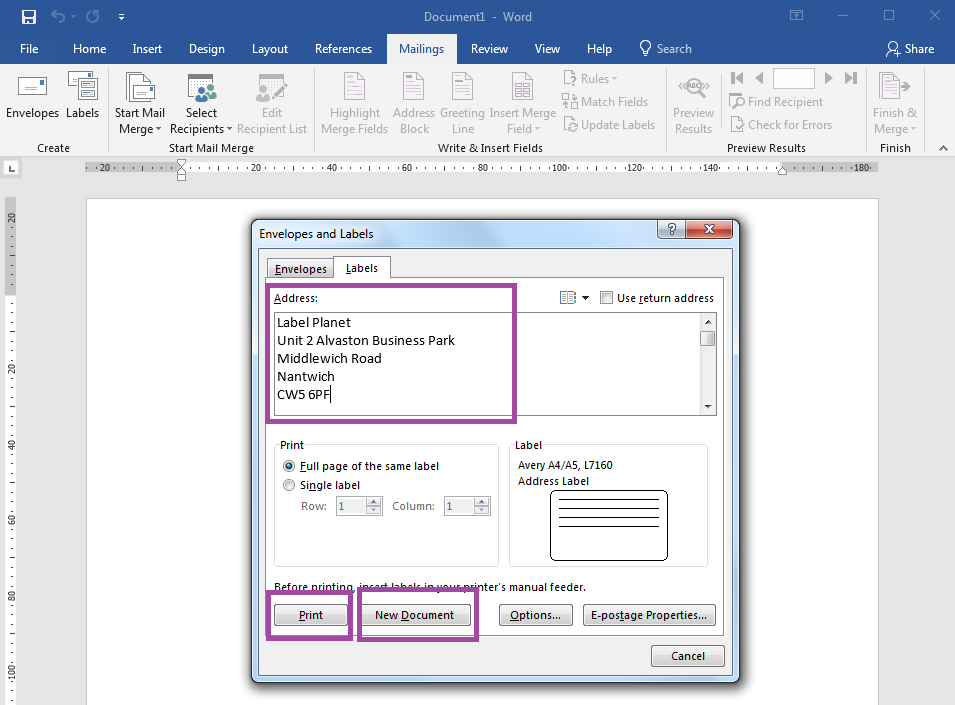
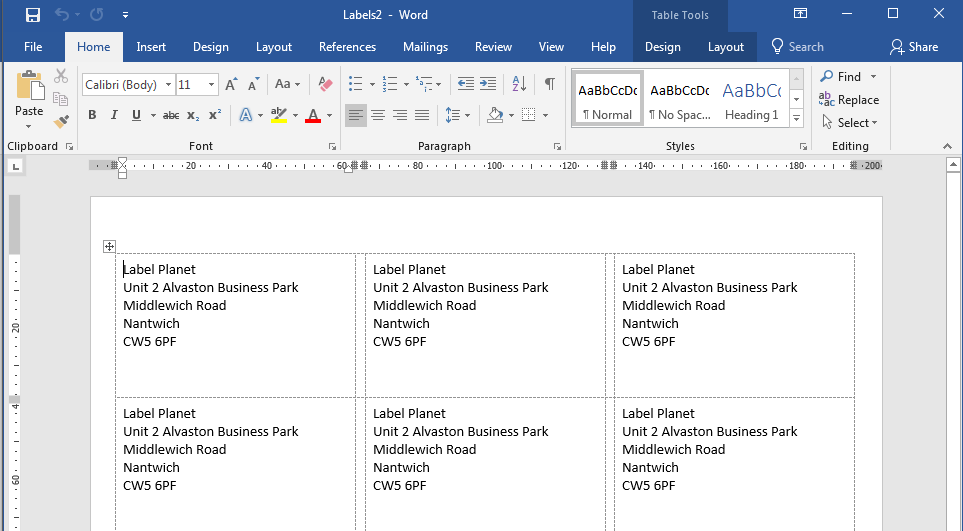
- To modify the design of your address labels (eastward.g. by adding a edge, background, paradigm or irresolute the font mode), click on NEW Document. This will open a new document containing a label template with your address added into each bare label.
CREATE LABELS – Footstep Four: Print YOUR LABEL TEMPLATE
As mentioned above, if y'all are printing plain accost labels you simply press the impress push. If you have created a new characterization template document to add more pattern work to your address labels, you have more than command over the print process. We recommend post-obit these steps:
- Printing FILE and then PRINT to get to the print preview page. Click on PRINTER Backdrop and ostend the following;
- The folio size is set to A4.
- No scaling options are set (e.k. less than 100% or "Fit to Page/Sheet").
- No options such as "Utilise Default/Commuter Settings" or "Ignore Printer Settings" are selected.
- Exam print your address labels by loading blank paper into your printer. Agree your test print against a sheet of your blank labels and hold both up to a light source to confirm that the alignment is correct. Y'all can so make any necessary adjustments before yous…
- Load your sheet labels into the media bypass tray (if your printer has one) and print your address labels.
Nosotros highly recommend using this method (rather than press directly from the Create Labels tool). It gives y'all like shooting fish in a barrel access to your printer's print settings and lets you perform a exam print. Without these options, you may find that you end upwardly with a gear up of misaligned (and unusable) accost labels.
Side by side Week On Template Tuesday: How To? – How To Print Address Labels Using "Post Merge" In Word

How To Print On Adhesive Label Sheet Template,
Source: https://www.labelplanet.co.uk/how-to/template-how-tos/print-address-labels-create-labels-word/
Posted by: wickerbutfult1935.blogspot.com
0 Response to "How To Print On Adhesive Label Sheet Template"
Post a Comment