

Synology Cloud Station Client Windows 10
Synology Bulldoze Server and Drive Client with Cloud Station Migration
Synology Drive is the successor to CloudStation, allowing you to store files in your own deject. Anyone granted admission can view and edit these files on whatever device. This postal service shows how to install Synology Drive Server with DSM 7 and how to ready up Synology Drive Customer on Windows.
As with its predecessor, Synology Drive works just similar offline files that are synchronized via a server, you gear up a folder on the Synology NAS, which is and then synchronized with any devices in the network or mobile devices on the get. The purpose is that files are available and up-to-appointment on all devices. Dissimilar a public cloud, you have 100% data control and no additional costs, so there is no circumstance with privacy.
Secure online admission to personal and shared data via Synology Drive Mobile App, desktop clients, web browser, or other Synology NAS, with granular permission settings and SSL encryption. Besides, Synology Drive Customer with backup task includes a simple and fast manner to back up the information.
Installation
The installation of Synology Drive Server is washed chop-chop, you lot open the package centre and enter drive in the search field, after clicking on Install the packet is deployed in a few seconds. However, the prerequisite is that the DiskStataion is DSM 7 capable, if this is not the case, get as here in this case and buy a new DS220.
The Windows client requires its counterpart, the desktop application Synology Bulldoze Client, which can be downloaded from DSM vii via the link "Go Synology Drive apps now" from the opened Synology Drive app.
An business relationship must exist created in the DSM command panel, if not already available, go to Synology Account to create new account, log in to Synology with your account, a QuickConnect ID can be created under External Access. Alternatively, in that location is the option of using the DDNS service, Synology offers itself as a service provider, or if y'all prefer another provider, one of the well-known DDNS providers can be selected.
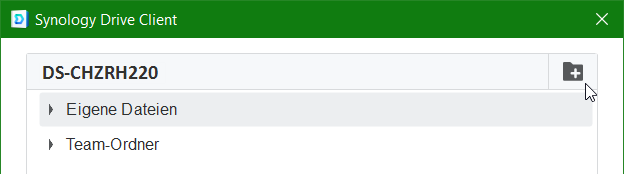
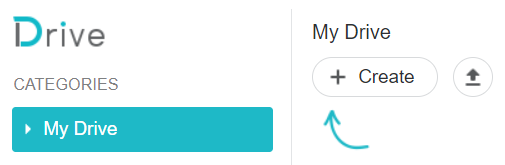
On the Windows the Synology Drive Customer is upwardly and running, click the +Create button to connect to Synology Bulldoze Server.
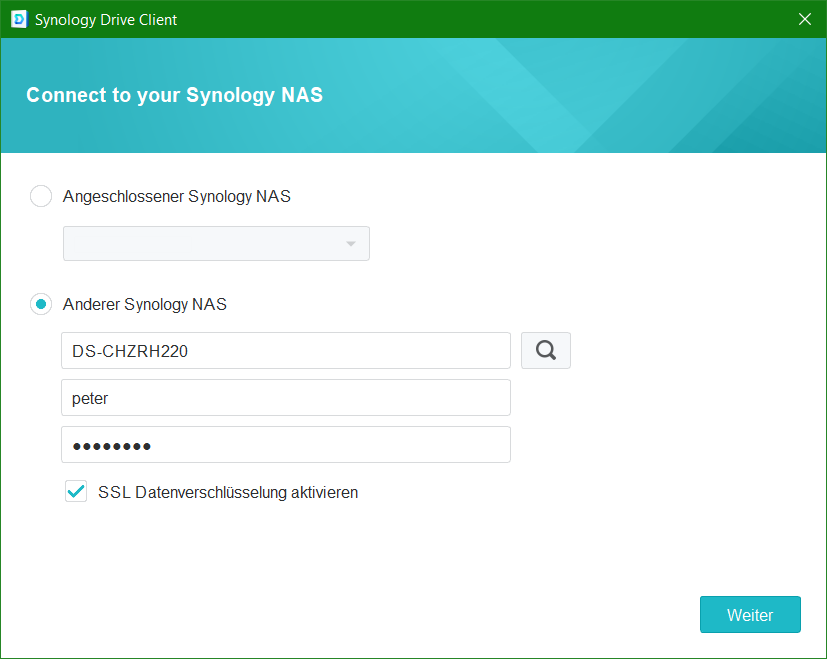
Choose Other Synology NAS and enter your domain name or QuickConnect ID followed by your user account and countersign.
After the connection to the NAS has been established, select the folder to exist synchronized with the Synology Drive Server.
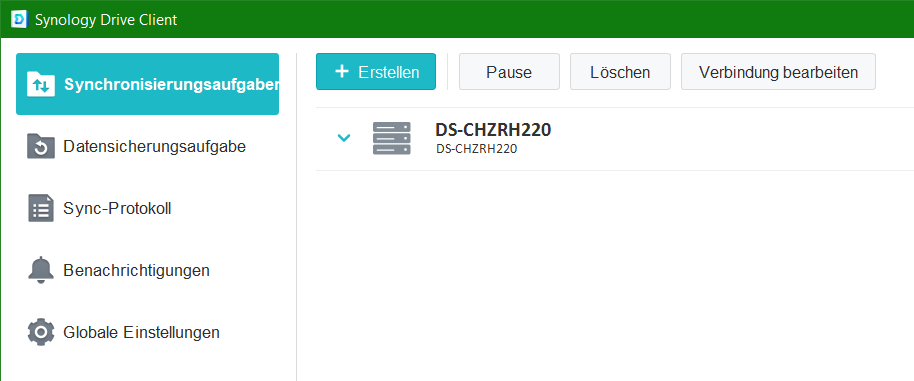
If you desire to create several Drive folders or synchronize other existing ones, click on the minor binder icon with the plus (+) in the upper right corner, hither you enter the binder name that you want to synchronize.
A look at Extended should not be missed.
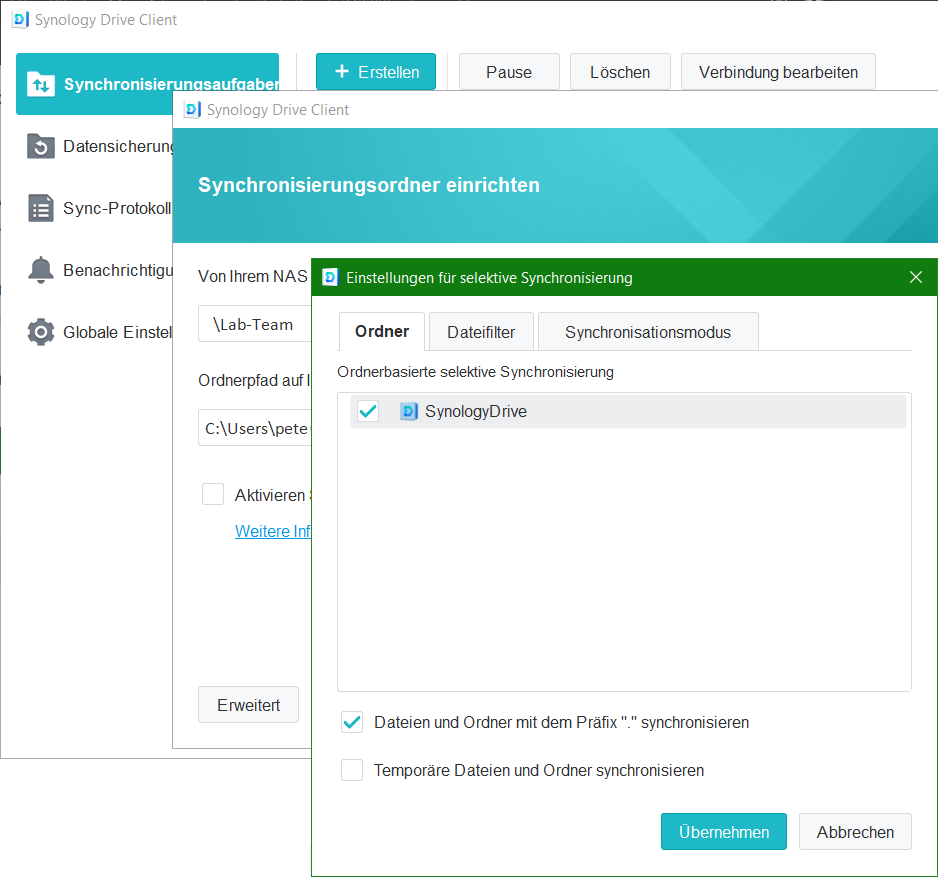
If y'all are also on the road with Linux, then check "Files and Folders with the prefix (.) synchronizing" is well worth it.
It must be ensured that the folder yous want to synchronize comes under the desired path. Past default, the "Create empty folder Drive" checkbox is selected.
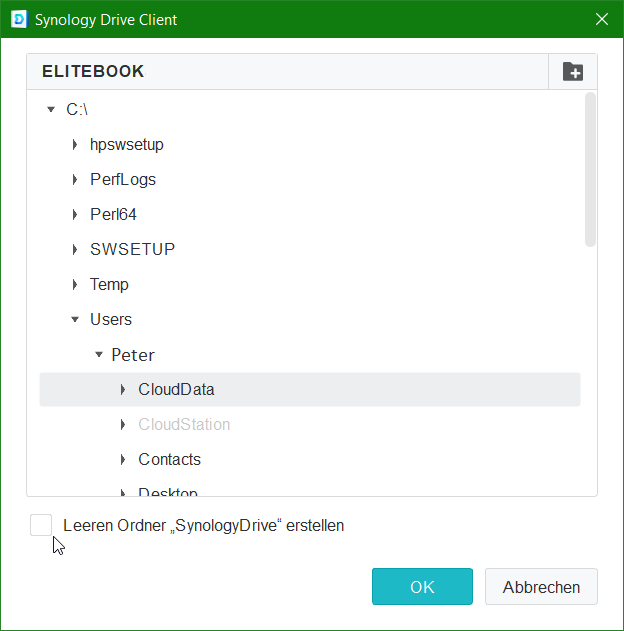
In practice, the simpler procedure proves to be preferred past creating the folder beforehand, which you only need to select afterwards.
If y'all go to Synology Drive in DSM, additional folders tin be created with +Create, it is important that you log in to the DSM with the same user account as you log in to the Drive Server.
In lodge to use Synology Bulldoze, the user must take the permission to go to Control Panel in DSM => User & Grouping => Edit your user => applications, here enable Synology Drive Allow.
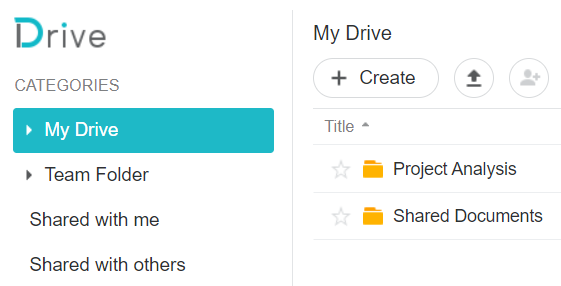
From the DSM app Synology Drive, additional folders can be created that can as well be shared with other users with a share, folders and files tin be uploaded and downloaded, moved, renamed and copied.
Upgrade from Cloud Station to Synology Drive
To employ Synology Drive, the NAS must meet the requirements, the list of available models lists the models that support Synology Drive.
Note: Both the Synology Drive Server parcel and the Synology Drive Client desktop application cannot exist downgraded. After information technology is installed, the original Cloud Station is replaced, you can only reinstall Cloud Station if you uninstall Synology Drive first. Synology Drive iii.0 does not back up Cloud Station applications (Cloud Station Server, Cloud Station Drive, Deject Station Backup, Cloud Station ShareSync, or DS deject). Information technology should upgrade to the corresponding counterparts in Synology Bulldoze 3.0 to ensure compatibility. Synology NAS models manufactured after July 2019 or devices running DSM seven.0 and after no longer support Cloud Station Server.
Important! Before updating to the Synology Bulldoze Customer desktop application, it is necessary to make certain that the NAS model is supported by Synology Bulldoze 3.0 with DSM 7.0, downgrade to Cloud Station is not possible.
If using Deject Station, the folders and files will proceed during removing Cloud Station.
After installation, you volition observe Synology Bulldoze Admin Console, Synology Drive, and Synology Drive ShareSync in DSM. Synology Drive Admin Console can be used to configure the settings and check the client listing. Synology Drive ShareSync can be used to create synchronization tasks betwixt Synology Drive servers.
Source: https://think.unblog.ch/en/how-to-setup-synology-drive-server-and-drive-client/
Posted by: wickerbutfult1935.blogspot.com
0 Response to "Synology Cloud Station Client Windows 10"
Post a Comment